Building the kick panels
The Kick panels
were constructed from GRP.
By careful
positioning of the speakers,
I managed
to achieve excellent staging and imaging...
Firstly,
exact replica kick panels were made by using the originals as a basis for
the moulds. The kick panel was first covered in masking tape and then coated
in grease, to ensure the original panel would not be spoiled by the mould
building process.
An
old piece of thick cloth was shaped over the original panel and then glassfibre
resin was applied and allowed to dry. When dry the mould was separated
from the panel and trimmed to size. I had formed a female mould from which
replica kick panels could be built.
The
inside of the mould was coated with grease and layers of glassfibre matting
and resin were applied. When it was dry the new panel was checked for fitment.
When
the approximate speaker positions were decided, I cut a piece of 6 ½
plastic tube to the correct angle to provide a basis for the speaker pod.
This will be more clearly explained in the photos.
The
piping was then secured with masking tape to the new kick panels I had
just built.
The
basic shape was formed also with masking tape. (See Photos)
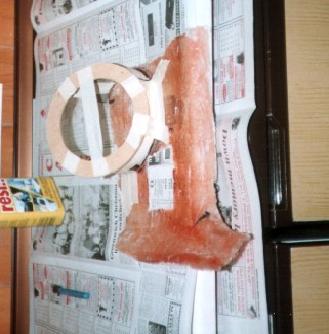
The
piece of plastic pipe I was talking about is under the MDF baffle, and
is just about visible.
You
can also see the GRP kick panel I had to build.

Under
the mass of masking tape, I hope you can see the MDF 'ring' I added to
allow firm attachment of the drivers. The masking tape was also covered
in grease before being covered in glassfibre. The top half (speaker pod)
and the bottom half (replica kick panel) were separated when dry and stuck
together with more resin to form the basic GRP speaker pod shape.

On
the left is the finished passenger side kick panel.
On
the right is the almost finished panel, to form the curvy shapes and provide
a suitable finish, the kick panels were covered in bodyfiller and smoothed
to shape. I used metallic anthracite paint, and a clear lacquer to protect
the paint finish.

